UART Console Service with SAMD21 Harmony
Table of Contents
UART Console Service with SAMD21 Harmony 🖥️
In this tutorial, we will implement the Microchip Harmony Console Service to enable UART-based console communication on the SAMD21 microcontroller. This service simplifies the process of creating a command-line interface (CLI) for embedded systems, allowing developers to interact with their devices in real time. The console service allows higher-level access to the UART interface to transmit data and implement print functions for formatted text output. Additionally, the console can be used with various hardware interfaces such as USB CDC.
Why Use the Harmony Console Service?
The Harmony Console Service provides a high-level abstraction for UART communication, making it easy to:
- Send and receive text commands
- Parse user input
- Execute predefined commands
- Send and receive data buffers
- Reuse code across PIC32 (UART) and ARM (SERCOM UART) platforms
This is particularly useful for debugging, testing, and configuring embedded systems without requiring a graphical interface.
Setting Up the Harmony Console Service
Step 1: Create a New Harmony Project
Follow the steps in the Harmony Hello World Guide to create a new Harmony project for the SAMD21.
In the device pin diagram window, select SERCOM5 PAD_0 and PAD_2, then find the SERCOM module in device resources -> Peripherals.
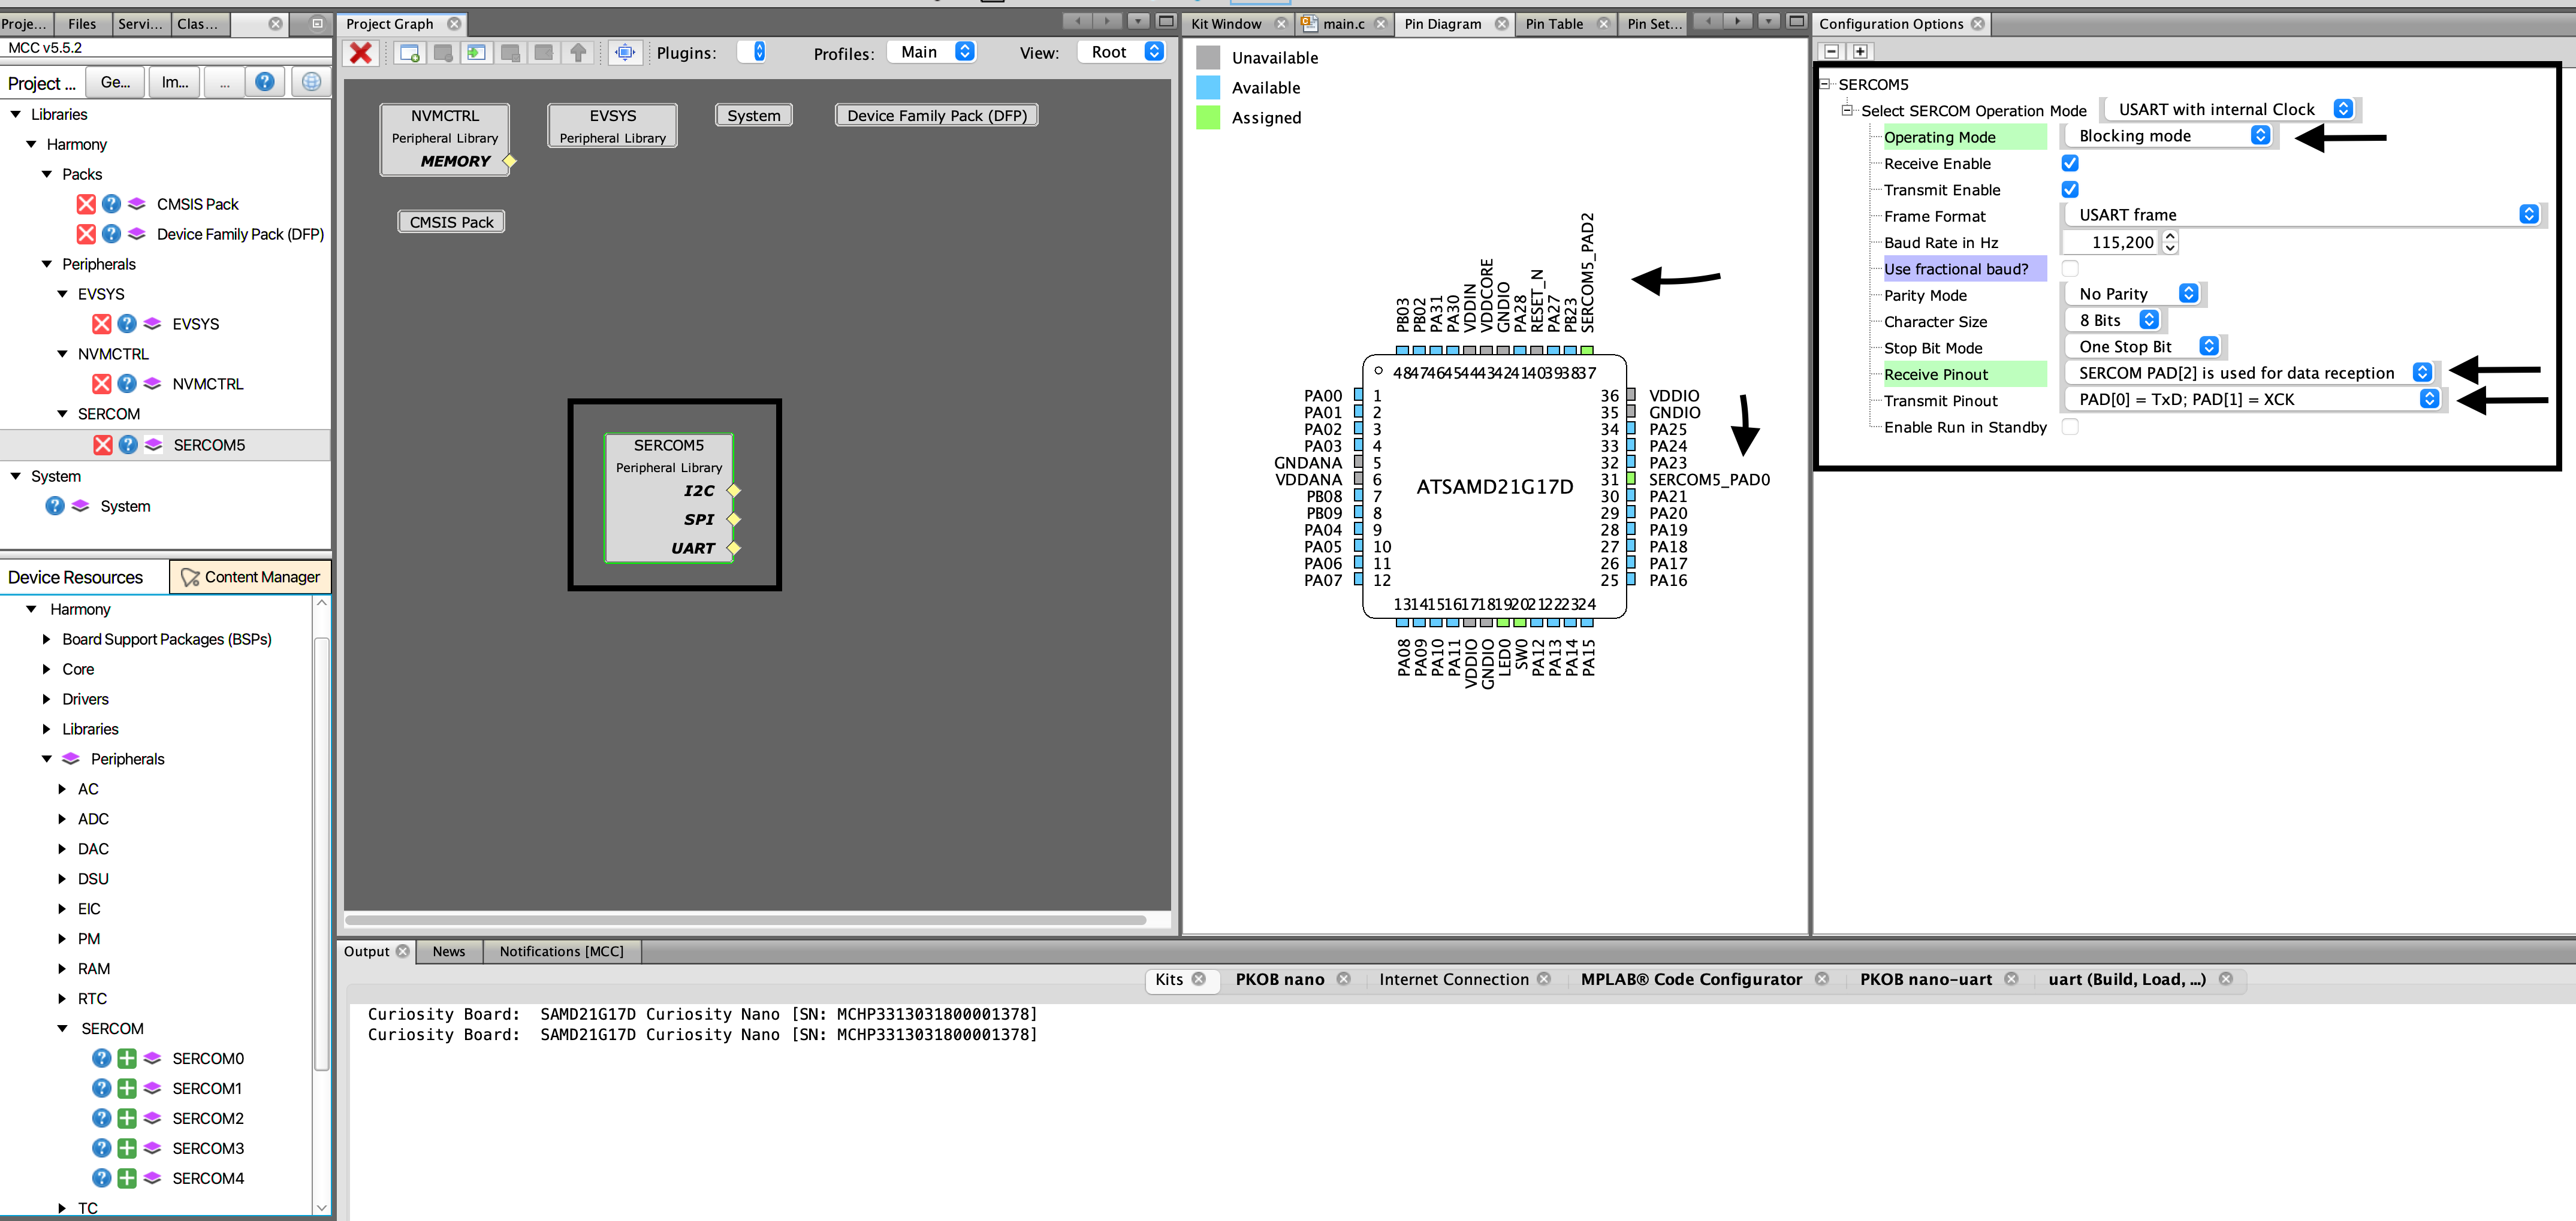
CDC TX connects to PB22; this will be our receive pin in the configuration. Set the receive pinout to PB22 PAD[2] and transmit to PA22 PAD[0].
Add the USART component and connect the SERCOM UART output to USART.
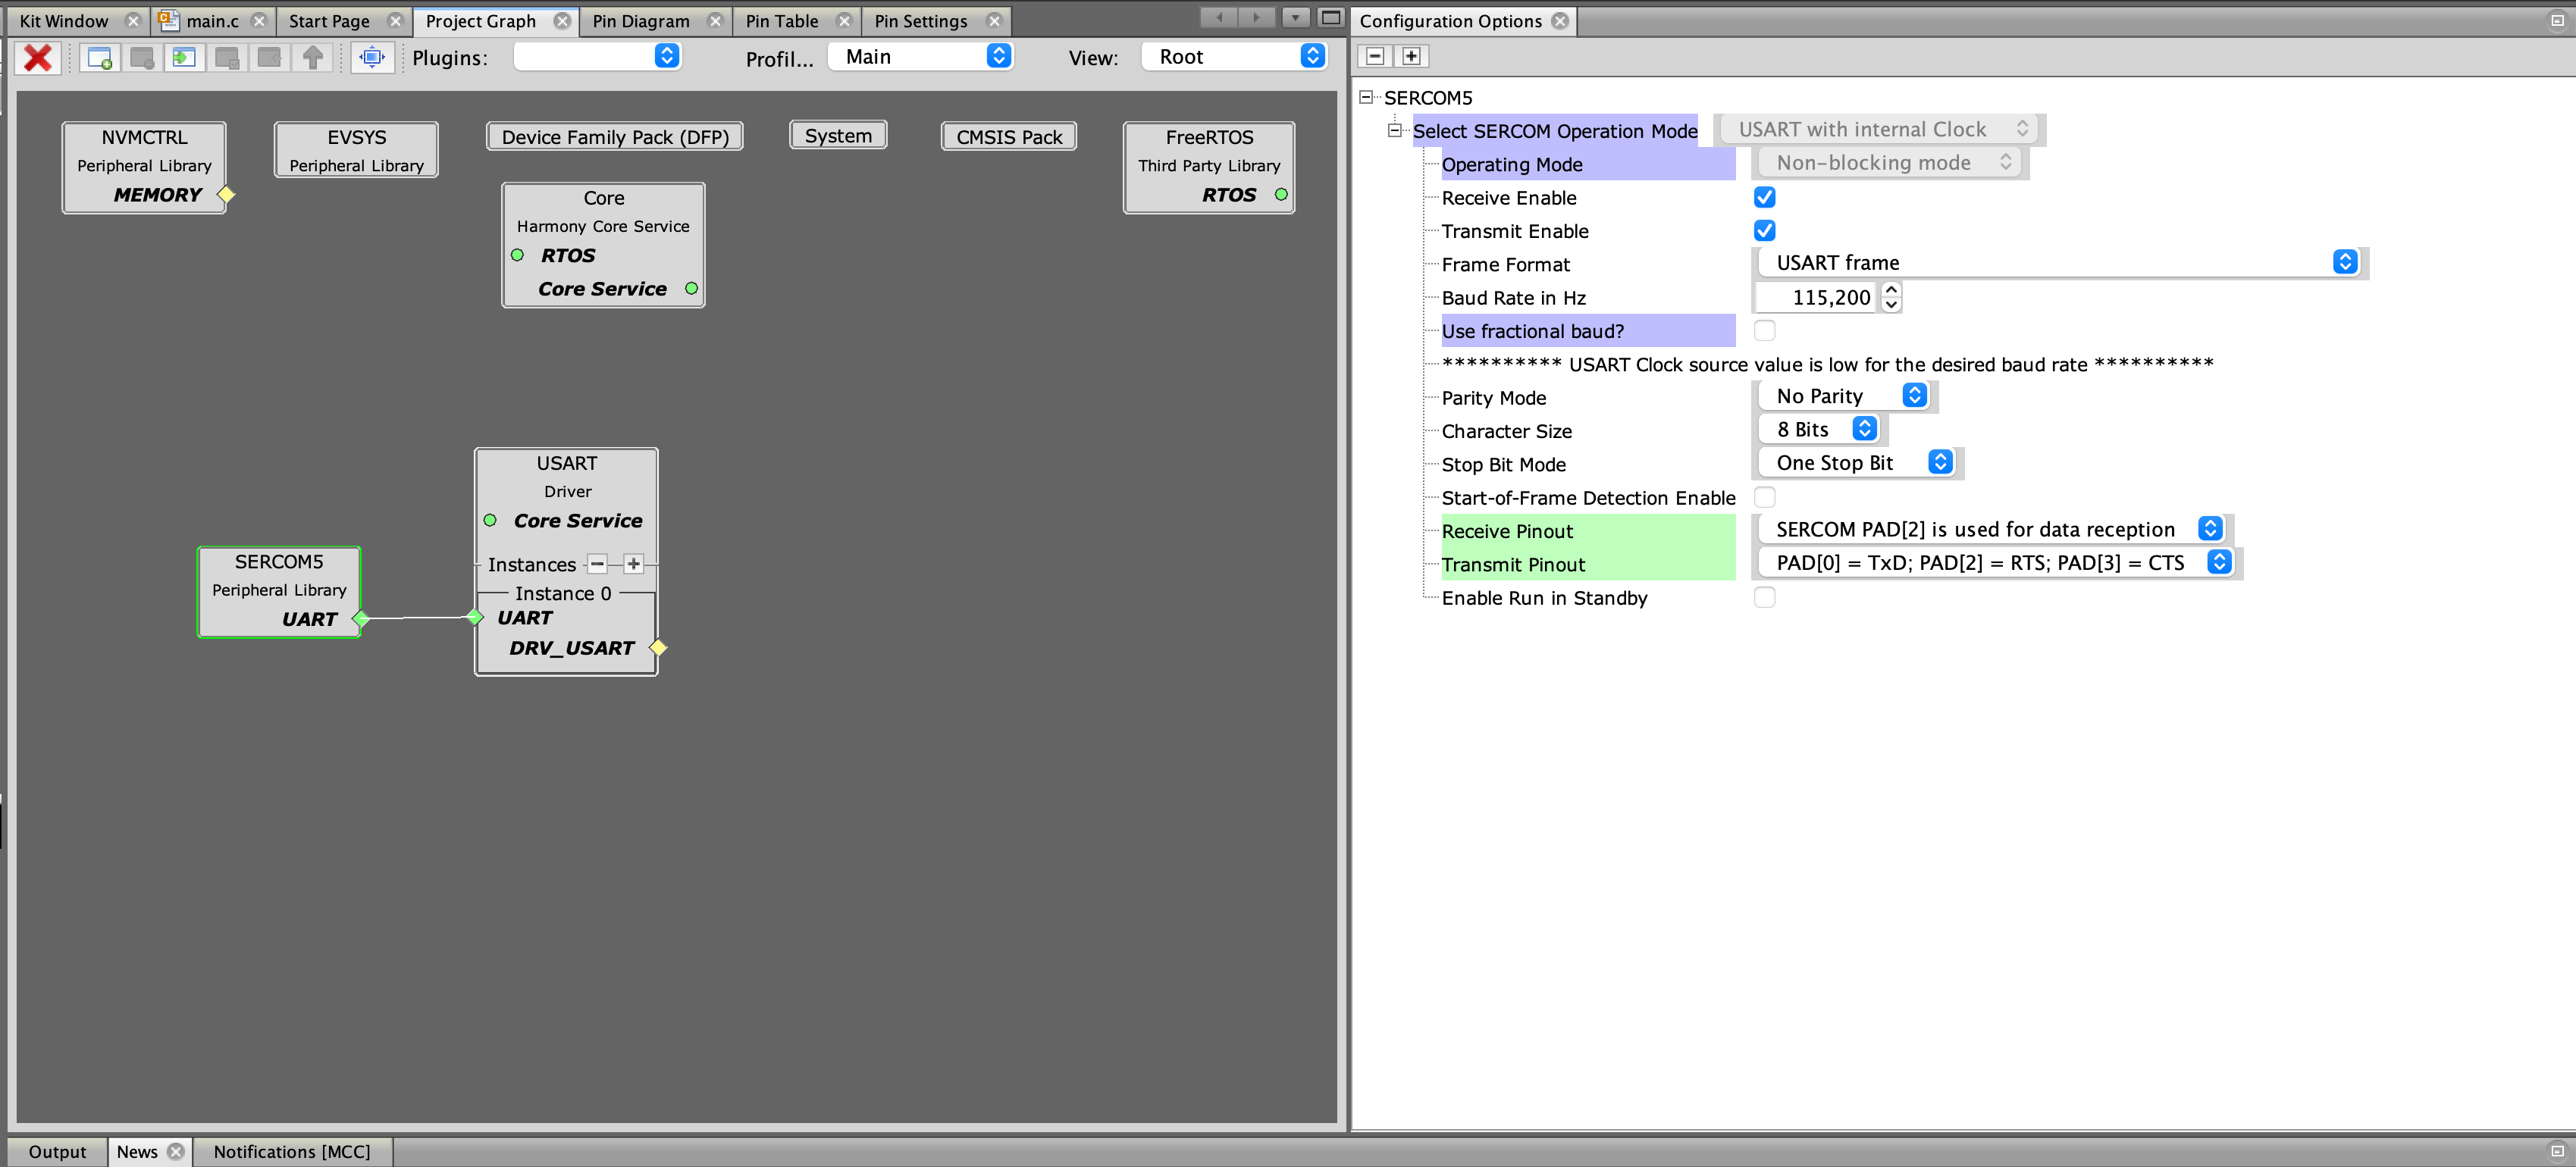
At this stage, we have gained access to the USART driver API, which provides higher-level access to the UART on both PIC and ARM controllers. You can see the API in the CSP documentation.
Quick overview of some of the USART functions:
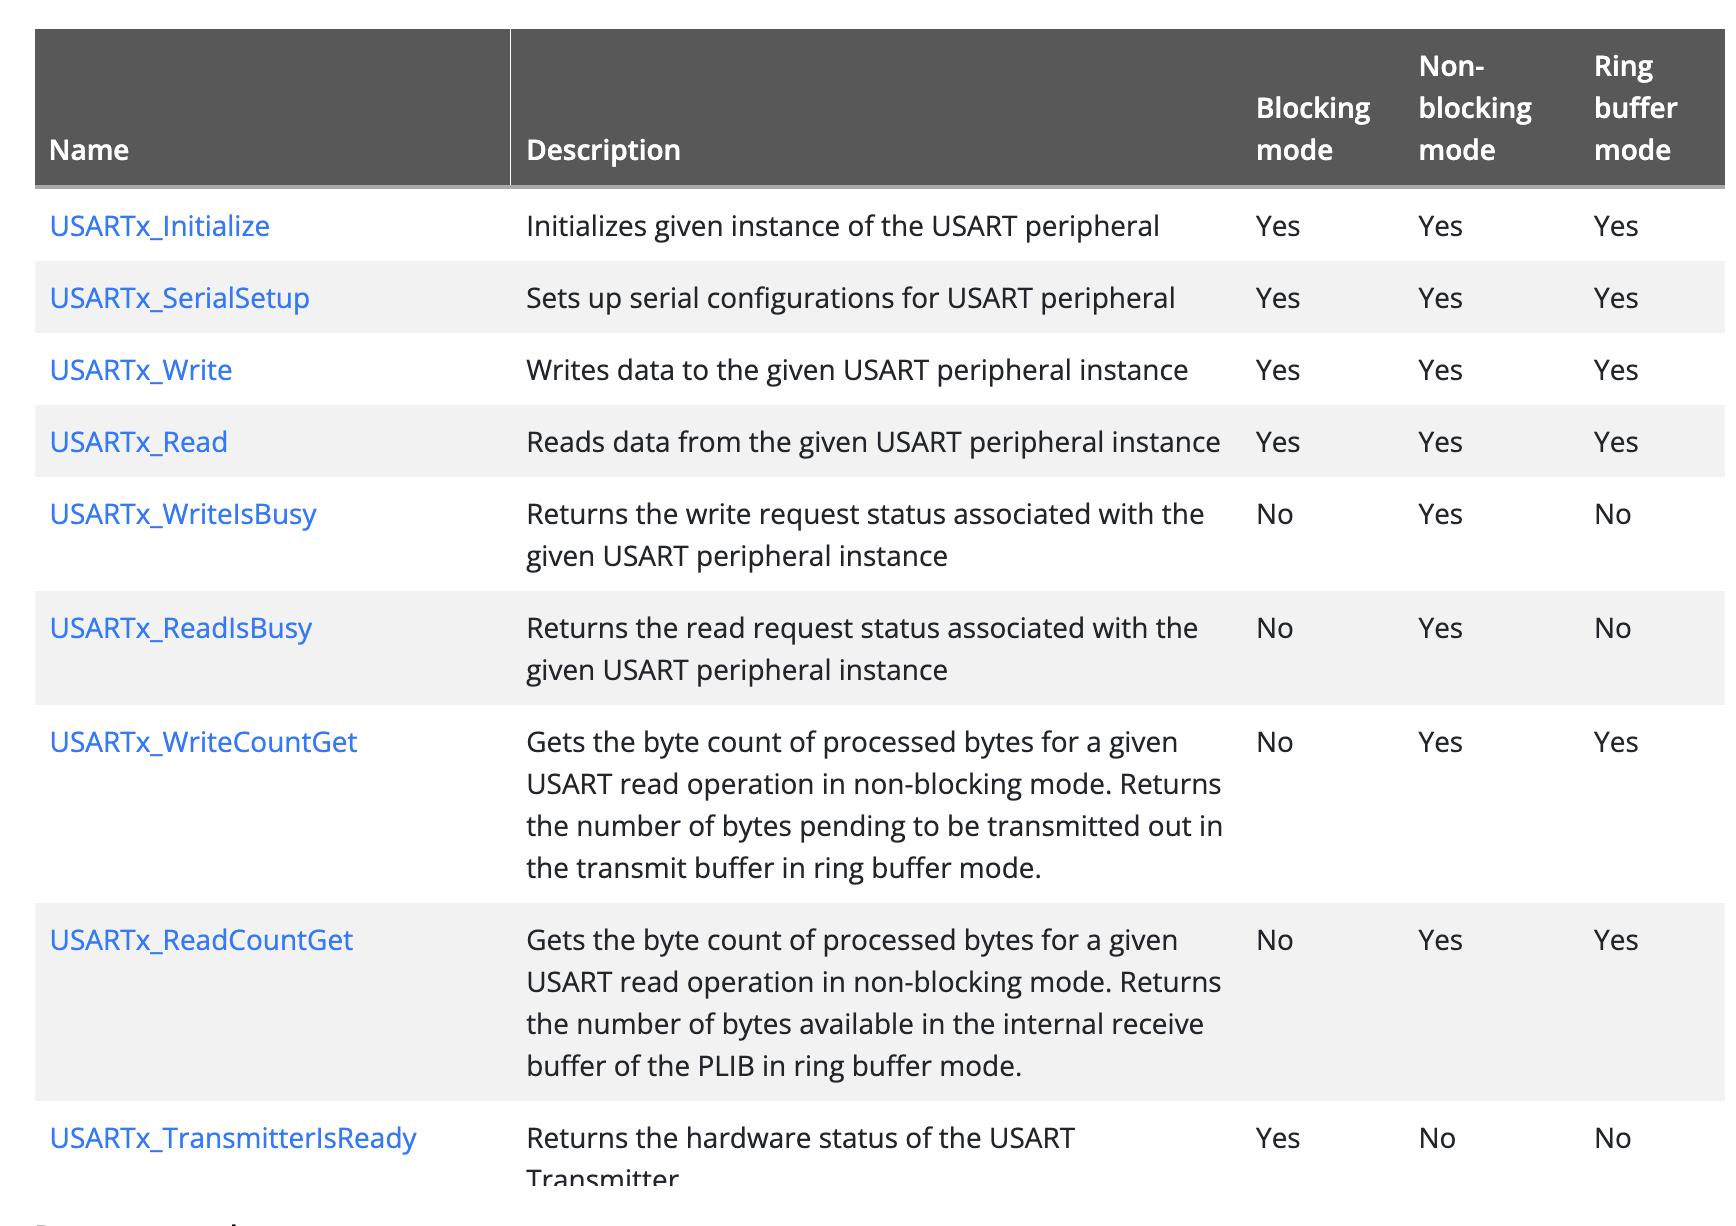
The flexible API provided by USART allows us to create more complex applications and manage writing from multiple sources.
In this tutorial, we will continue and make use of the console service.
Step 2: Add the Console Service
- Open the MPLAB Harmony Configurator (MCC).
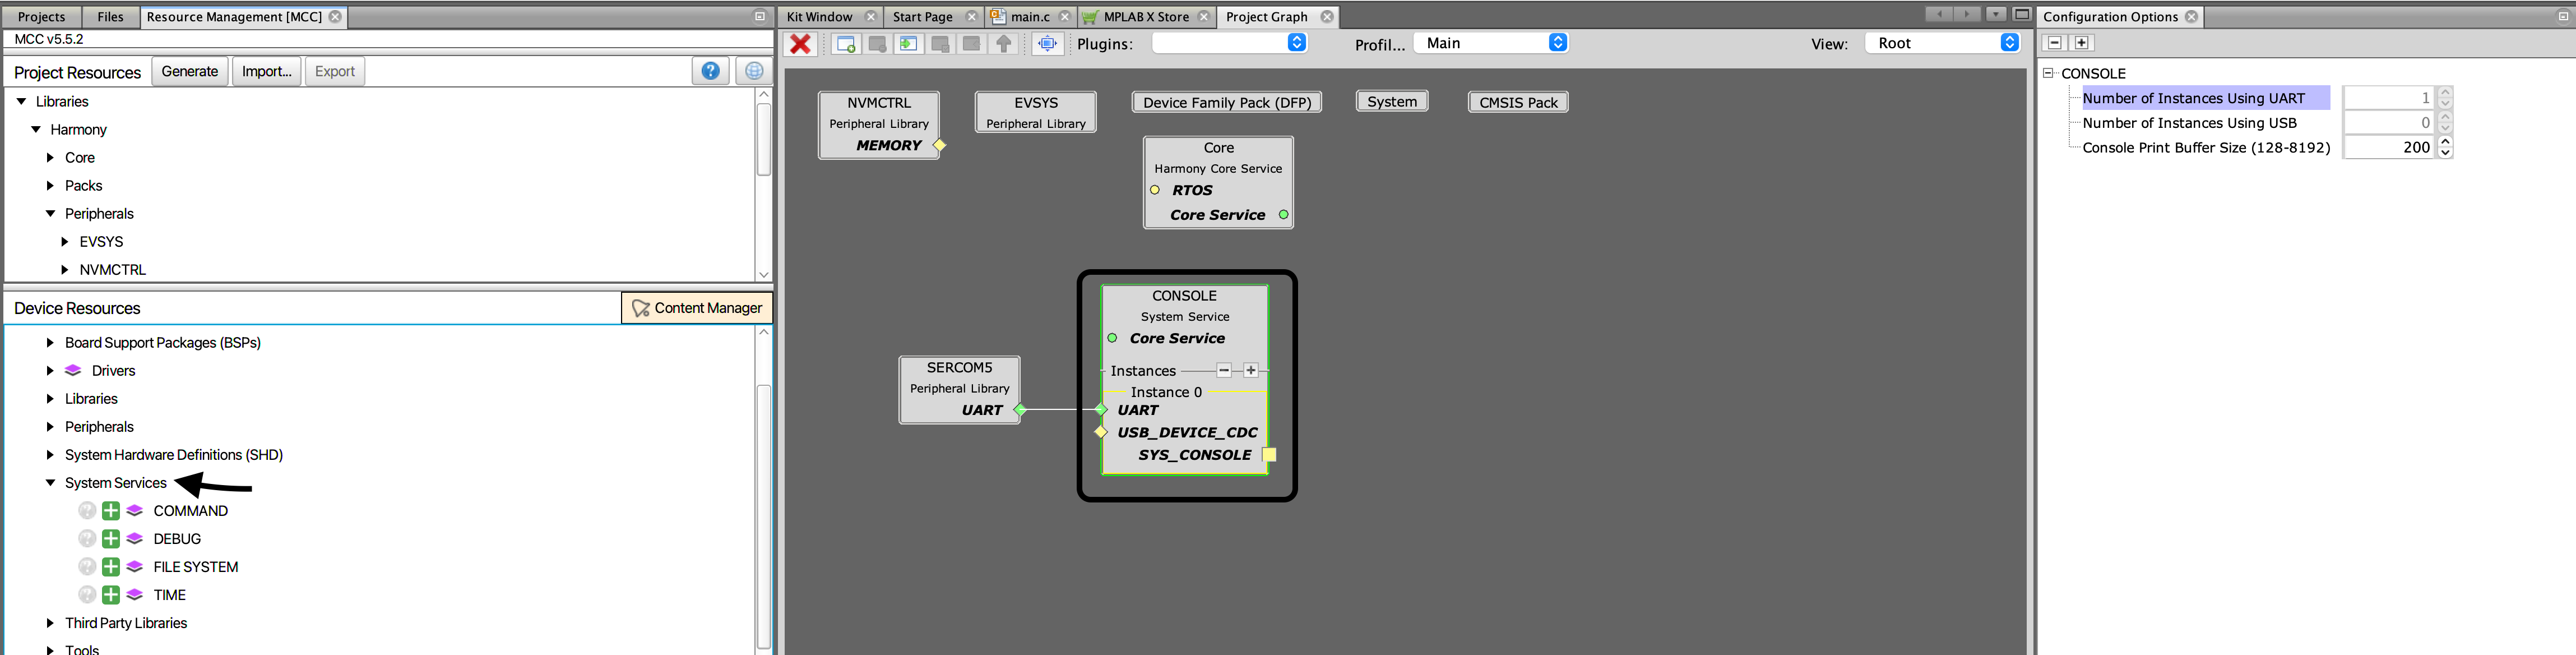
- Navigate to Middleware > System Services > Console.
- Add the Console Service to your project.
- Configure the Console Service to use the UART (e.g., SERCOM5).
Step 3: Generate Code
Click Generate Code to apply the changes and generate the necessary files for the Console Service.
The console is part of the Harmony core libraries. Unlike the CSP, it implements higher-level services that interact with CSP components. The high-level diagram of how the console is implemented can be found in the Harmony v3 GitHub core repository: Core Console Docs. Refer to this for the full set of examples.
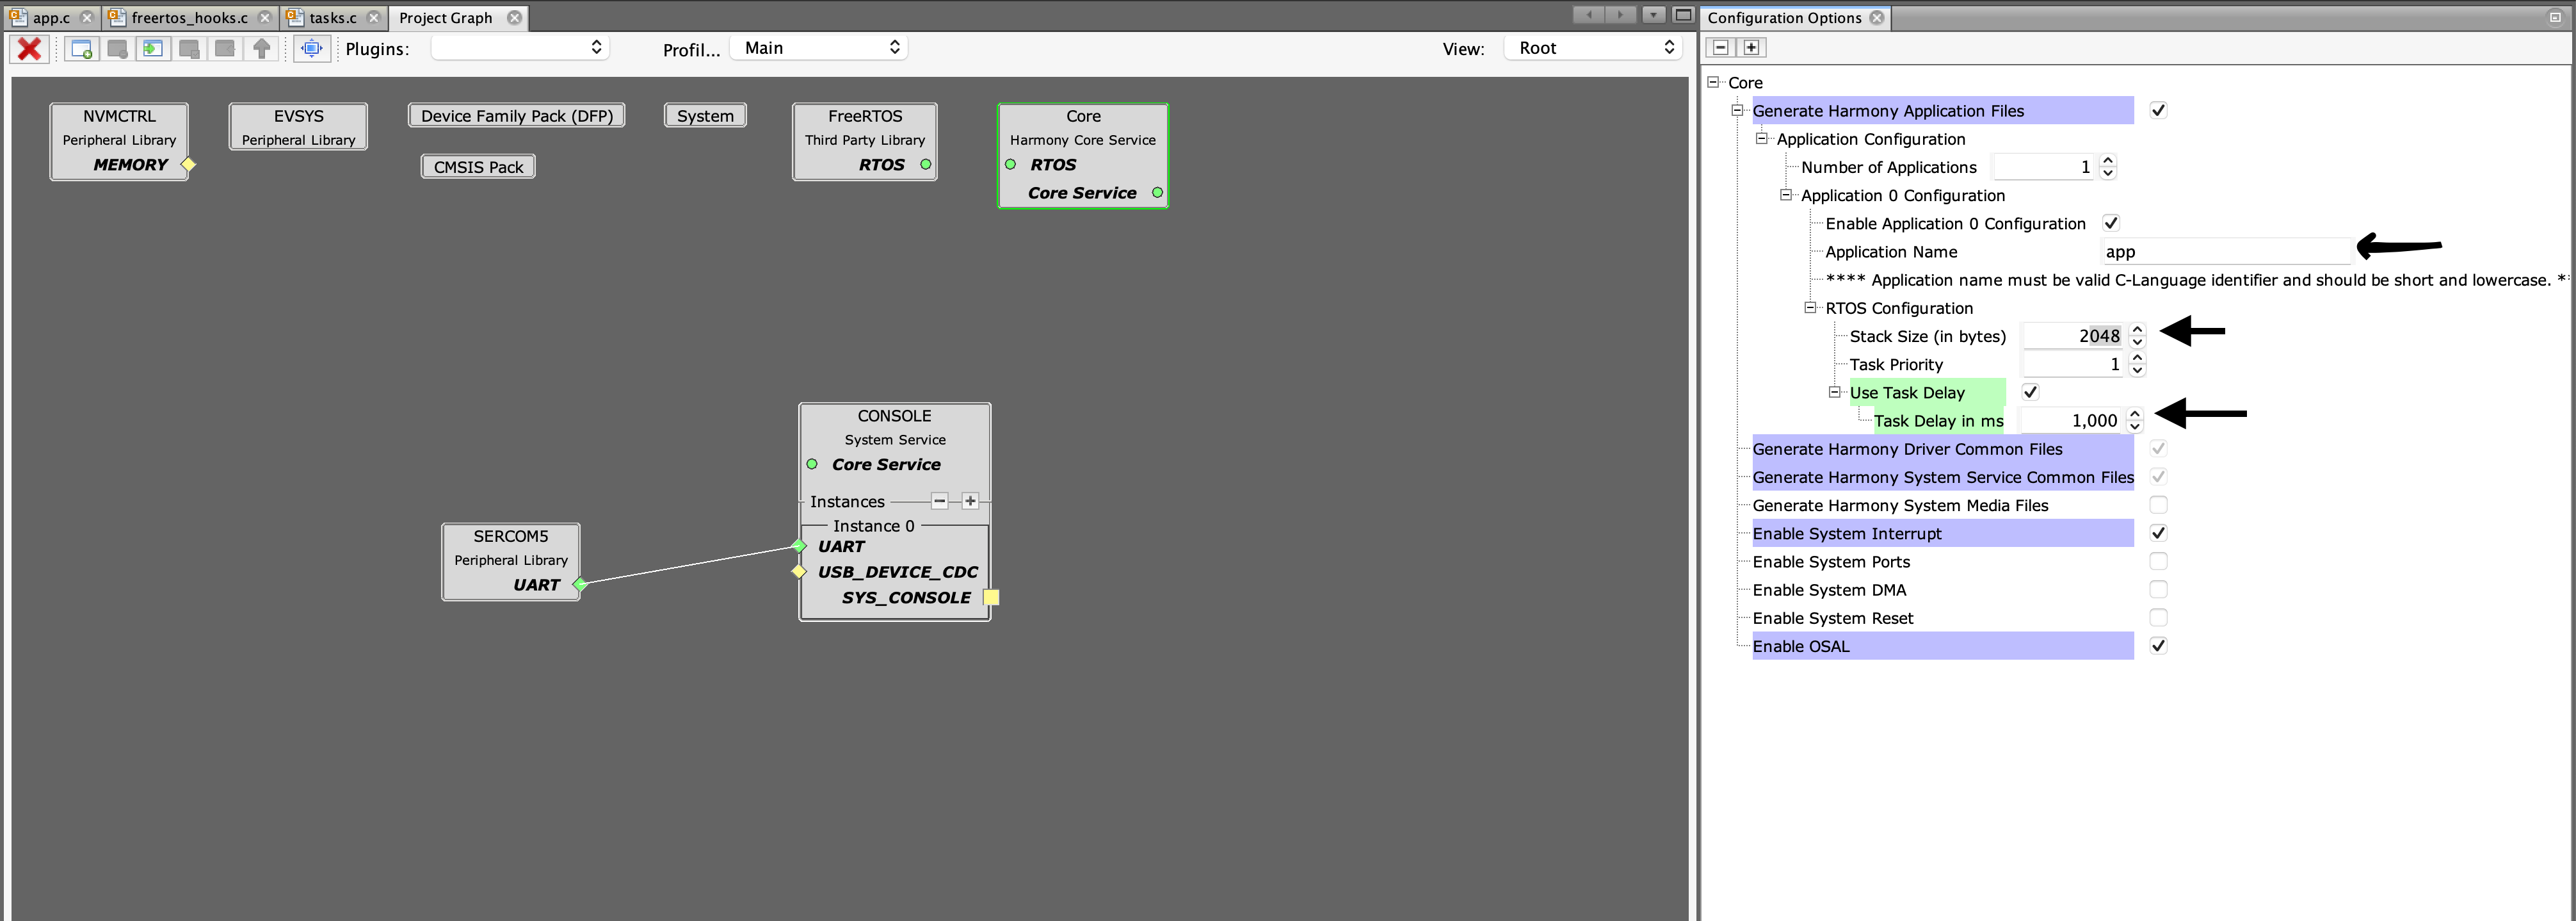
One of the reasons Harmony is challenging for beginners is its dependency on RTOS. Including the console forces the inclusion of FreeRTOS, which can be confusing for beginners. Since our task and console will use some stack, we will allocate extra memory for the task in the RTOS application settings. Set the Stack Size (in bytes) to 2048.
We want to configure the default task generated by adding a small delay of 1000ms.
Step 4: Implement the Console Commands
Now we can test our console. Navigate to the app.c file, which is pre-populated with task boilerplate code.
Include the following at the top of the app.c file:
#include "definitions.h" Add this code to the APP_STATE_SERVICE_TASK:
        case APP_STATE_SERVICE_TASKS:
        {
            static int i = 0;
            SYS_CONSOLE_PRINT("Hello from Console %d \n", i);
            i++;
            break;
        }
Step 5: Test the Console
- Build and program the project onto your SAMD21 board.
- Open a terminal application like the web-based debug tool plotSerial.
- Click connect and select the debug port.
The output should update every 1 second with the text and a changing number.
Conclusion
The Harmony Console Service is a powerful tool for creating interactive command-line interfaces for embedded systems. By following this tutorial, you can quickly set up a UART-based console on the SAMD21. The console supports various functions such as data write, read, and formatted print (like the printf function). It can also interact with other Harmony services such as Debug or Command.
In the next post, we will explore the command interface to build an interactive command-line interface to control our device via text commands. Stay tuned for more tutorials on advanced Harmony features! 🚀